A guide for installing and using Facebook Pixel
Facebook Pixel - Why you need it and how to work with it
If you have been around the digital marketing world in recent years, you probably came across the term “Pixel”. Pixel is a tool by Facebook, which allows you to measure conversions on your website and build specific target audiences for your campaign. Needless to say, this tool offers a much wider selection of elements and features that are worth getting familiar with, so that you can make your campaign as precise as possible, while gaining more traffic and optimised conversions for your website.
Pixel is a code that you implement on your website or a desired landing page, allowing it to connect Facebook’s advertising system with what is happening on your website (or landing page). Through the information gathered by the Pixel, we can receive detailed information on who is using our website, how did they find it, and most importantly- what are they
Advantages of using Facebook Pixel
According to the guide offered as a reading material on the Pixel by Facebook itself, these are the advantages of using Pixel:
- A means to make sure your campaign is getting the results you want.
- Creating Custom Audiences on Facebook- a subject we wrote a thorough article about which you are welcome to read.
- Advanced conversions and insights reports.
- Quick and friendly information management.
Seemingly this sounds like a useful tool that will help you save time and gather more detailed information on your website’s clients and users. But if you are afraid of the technical aspect, read further to find out why the demon is not as scary as you might think.
How to install Facebook Pixel
- On the Facebook Business Manager page, choose Pixel from the menu.
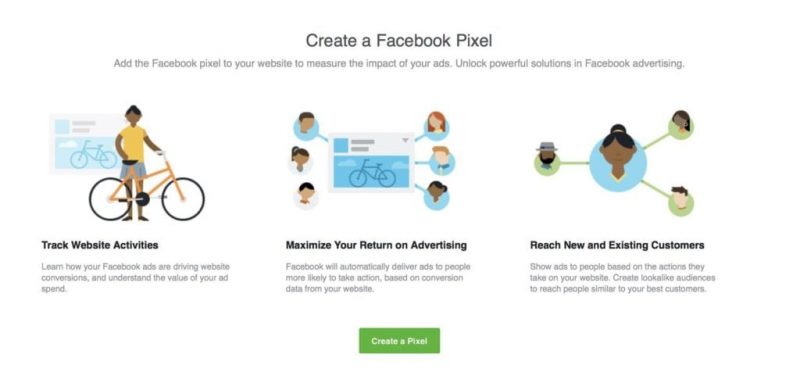
- In case you don’t already have Pixel, a new window will pop up suggesting that you install one. Just press Create Pixel.
- A new window will pop up where you will be asked to name your Pixel.
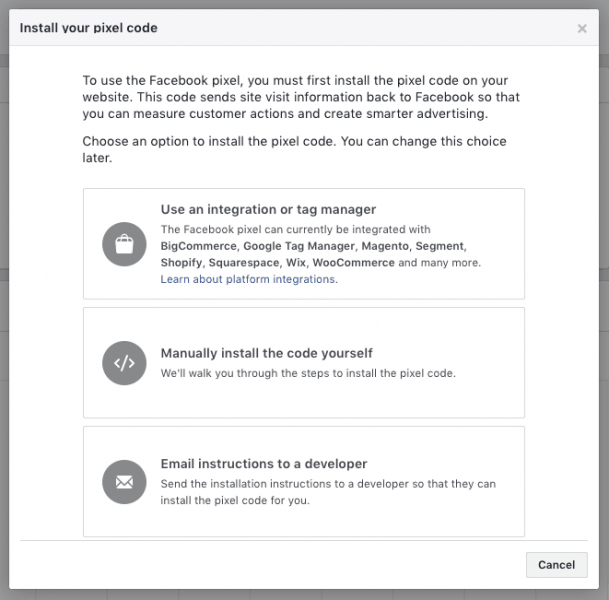
- Following that will be the most “difficult” part of the Pixel installation. You will find 3 options for installation:
- With Google Tag Manager (which we also wrote an elaborate article about for your use)
- By copying and pasting the code directly into your website.
- By sending the instructions to a developer you are working with.

That is all for the installation. Wasn’t so complicated, was it? It is important to notice that if you chose to copy and paste the code yourself, you will need to implement it on the head of the website so that it can properly measure all the important parameters.

What can you track using Pixel?
In addition to counting users on the website, Facebook Pixel can track 9 other behaviours that are happening on your website:
-View content
-Site search
-Add to cart
-Add to wishlist
-Add payment info
-Lead
-Complete registration
-Purchase
-Checkout
Technically, you can measure all sorts of other events as well, however this will require wider technical knowledge, and we won’t get into that for the time being. If you wish to learn more about the technical aspects and how to apply other events tracking, have a look at this link.
After you have implemented the Pixel on your website, it’s time to make sure that it is working. The best way to do this is by downloading the Pixel Helper Chrome Extension. After you install it, you will be able to use this extension to easily see if the Pixel is on the website, which events is it measuring, and if everything is properly installed.

Highly important- you can only open one Pixel for each advertising account (previously you would have needed to install a separate Pixel to each measure and conversion), however, you can install the Pixel on a number of websites. It is important to be as precise as possible with the definitions and conversion goals, as well as accurately registrate the full URL, or you might lose track on which traffic belongs to which website.
What to do next with the Pixel
So, we have installed the Pixel, set up events, and made sure everything is working. But is that all? Of course not. If all you do is implement the Pixel on your website, not much is going to happen. You will start gathering information about user behaviour on your website, but that is about it. In order for you to start making the most out of what Pixel has to offer, you will need to start targeting audiences based on this data, which you can read about on our blog.
After we have completed all of these actions and right as we reach the end, we recommend that every time you create an advertising campaign, make sure the campaign itself is in fact using Pixel in order to track conversions and users source (UTM parameters). For some reason, Facebook did not make that option the default, so it is important that you to make sure it is on. (For those of you who are running advertising accounts with several different Pixels, pay close attention to which Pixel is tracking which campaign, to prevent any unwanted confusion between Pixels and different websites tracking).
If you are in a mutual campaign with another company, but you only created one landing page for that specific campaign, you can use that same page to implement a number of Pixels and have each one sending data to a different ads account. This is perfect for cooperation, as it allows you to implement a wide number of Pixels on the same page.
If you are seeking further information on the various implement options and other opportunities that this wonderful tool can allow you, have a look at this article for some examples on how different companies are using Pixel in different ways. You can also contact us at Alt_ and we will be happy to assist with any question or issue.
Asaf Shimoni | CEO
Alt_


A Review of Canva Magic Studio – An AI Tool for Innovative Visual Content Creation
A Review of Canva Magic Studio Blog 55A Morton Road, N1 3BG, London, United Kingdom See what we’re up

A Review of CVViZ – An AI-Powered Tool
A Review of CVViZ Blog 55A Morton Road, N1 3BG, London, United Kingdom See what we’re up to on

7 Ways to Use AI Tools for Organic SEO
Seven Ways to Use AI Tools for your site SEO Blog 55A Morton Road, N1 3BG, London, United Kingdom
REQUEST A WEBSITE CHECK
See how your website could be performing better.
